Let’s Get Started:
Below we start with all about the Aeropress, when and why. Then we look at how easy it is to use with a step-by-step recipe. We compare it to other coffee brewing methods. And finally there are some FAQ’s (Frequently Asked Questions).
Skip ahead to the method and recipe if you already have the kettle going, or read on, you may learn something you didn’t know.

Introduction to Aeropress
In 2005, Stanford engineer Alan Adler revolutionized coffee brewing with the invention of the Aeropress. Starting from his home garage in early 2004, Adler sought to improve his daily cup of coffee by reducing its acidity and harshness. The Aeropress is now crafted from BPA-free materials and quickly gained popularity for its simplicity and ability to brew smooth, flavorful coffee. Alan Adler, also known for founding Aerobie, renowned for inventing the Frisbee. His invention has been so popular that it has since sparked an international phenomenon, the annual Aeropress Championships.
What is an Aeropress?
Imagine a syringe and a French press had a coffee-loving baby. It consists of two cylinders, a plunger, and a filter cap, all made from durable, BPA-free plastic. This design allows for full control over the brewing process, resulting in a cleaner cup with less bitterness.
Components of the Aeropress
Let’s break down the key parts of the Aeropress:
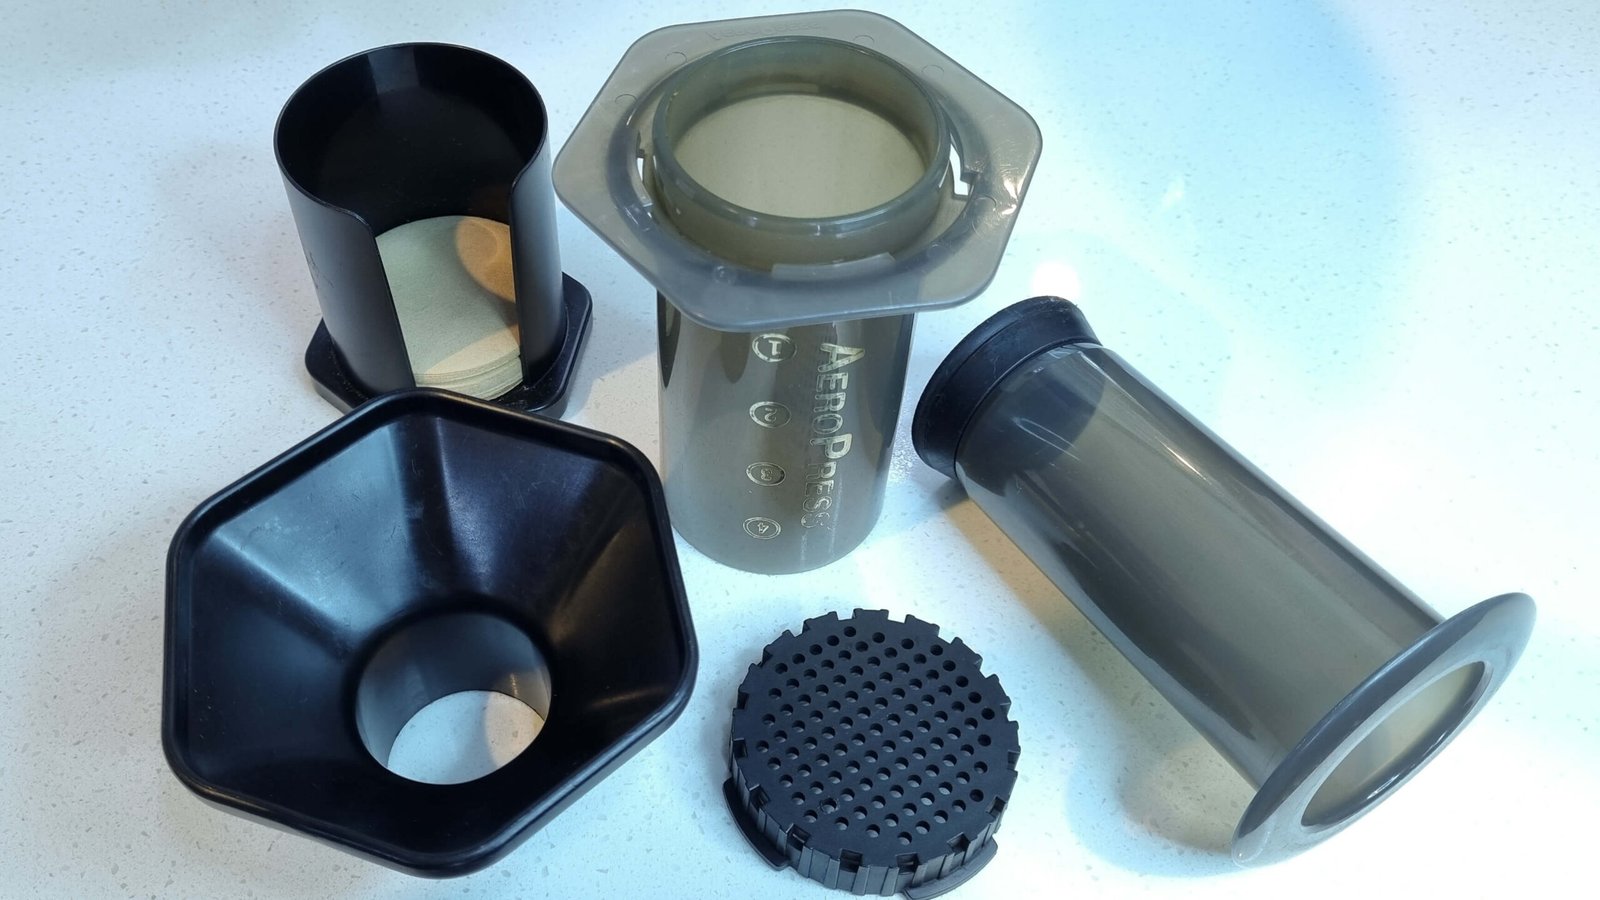
Aeropress Chamber
This is where the magic happens. It holds the coffee grounds and water during the brewing process. The chamber is marked with numbers for precise measurements, ensuring consistency in your brews.
Plunger
Pushed through the chamber, the plunger creates pressure to push hot water through the coffee grounds and filter. It’s designed to fit snugly inside the chamber to create an airtight seal.
Filter Cap
At the bottom of the chamber is where the filter cap can be screwed on and off. It holds the micro-filter in place or a metal filter if you have chosen this option when buying yours, which prevents any grit from ending up in your cup while allowing the flavorful oils to pass through.
Funnel & Filter Papers
The filter papers may vary in color but not size. There are many places that sell these filters and in my experience most of them are compostable.
The funnel is used to reduce mess when putting your coffee grounds into the chamber. It could also be used when pouring the hot water.
How Does the Aeropress Work?
Now, let’s dive into the brewing process step-by-step to understand how to make a perfect cup of Aeropress coffee. Trust me it’s easy.
Step 1: Prepare Your Aeropress
Start by assembling some of the pieces together. Place a paper filter inside the filter cap and rinse it with hot water to remove any papery taste. Screw the filter cap onto the chamber, then place your it cap down onto your mug. The wings on the chamber should sit on the rim of your mug stopping it from falling in. I’ve found that some mugs have a smaller opening and if the fit is too tight some coffee can spill out the sides when you start plunging.
Step 2: Add Coffee Grounds
Measure and grind your coffee to a medium-fine consistency (resembling table salt). If you are buying pre-ground coffee make sure it’s labeled for filter or ask your cafe to grind it for you. Their grinders usually already have all the presets. Add the grounds to the chamber using the funnel provided, ensuring a level surface by giving it a shake. Use a coffee to water ration of 1:15 to start. Meaning if you put 15g of coffee grounds in you should use 225g of water.

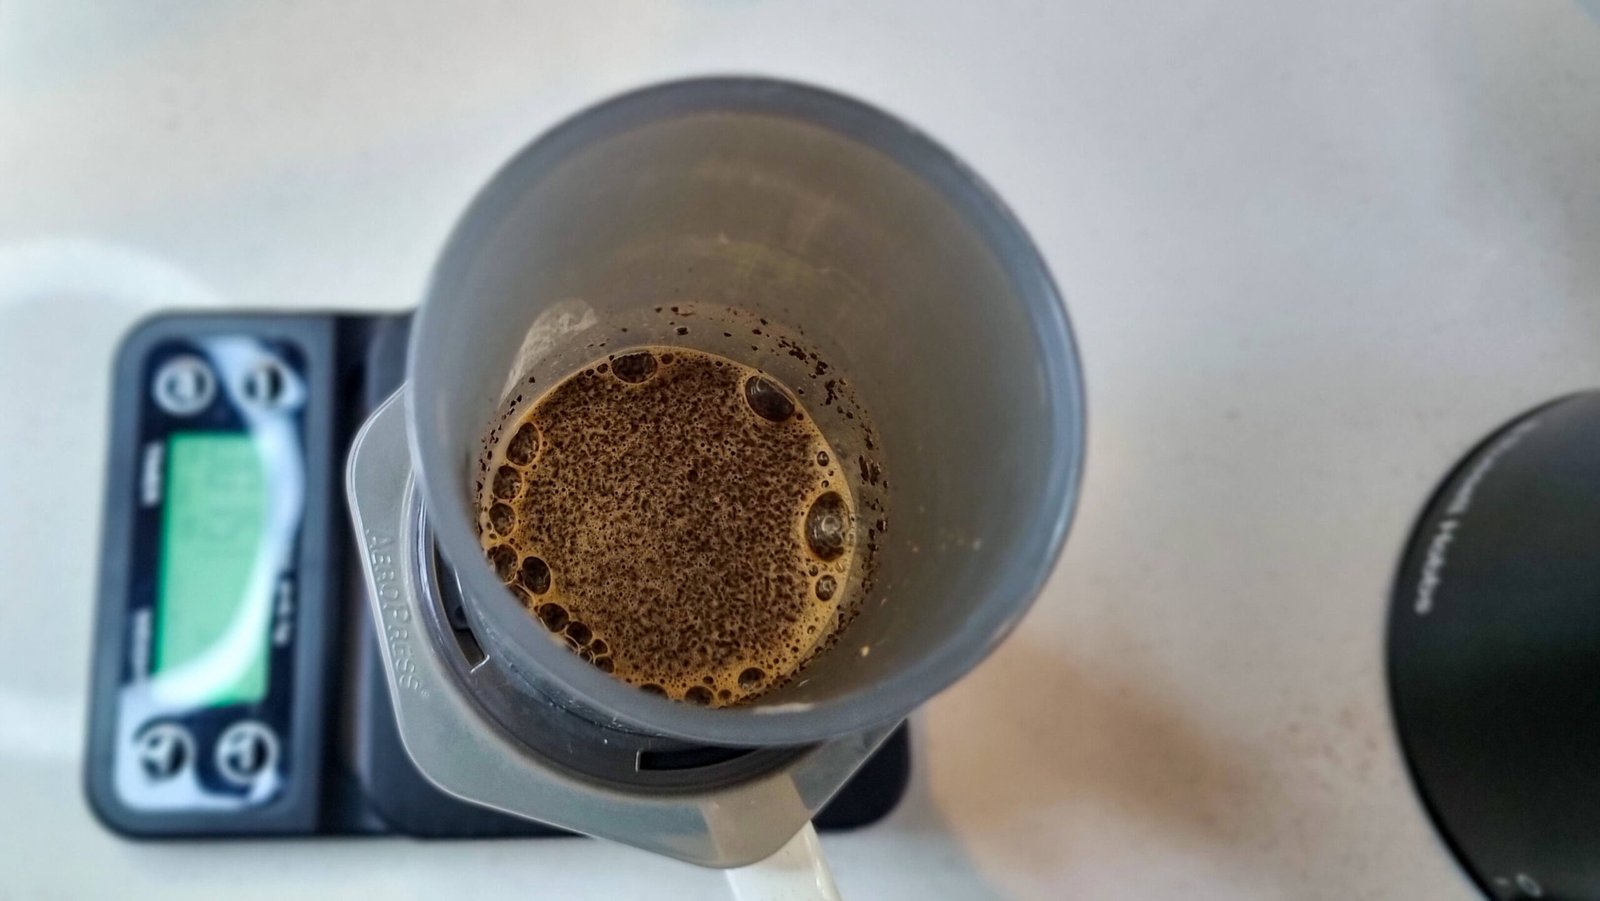
Step 3: Bloom Your Coffee
Pour hot water over the coffee grounds, just enough to saturate them. Give a quick stir or I like to give it a swirl. This step allows the coffee to “bloom,” releasing trapped gases and enhancing flavor extraction. Start your timer as soon as the water hits the coffee and let it bloom for around 20sec.
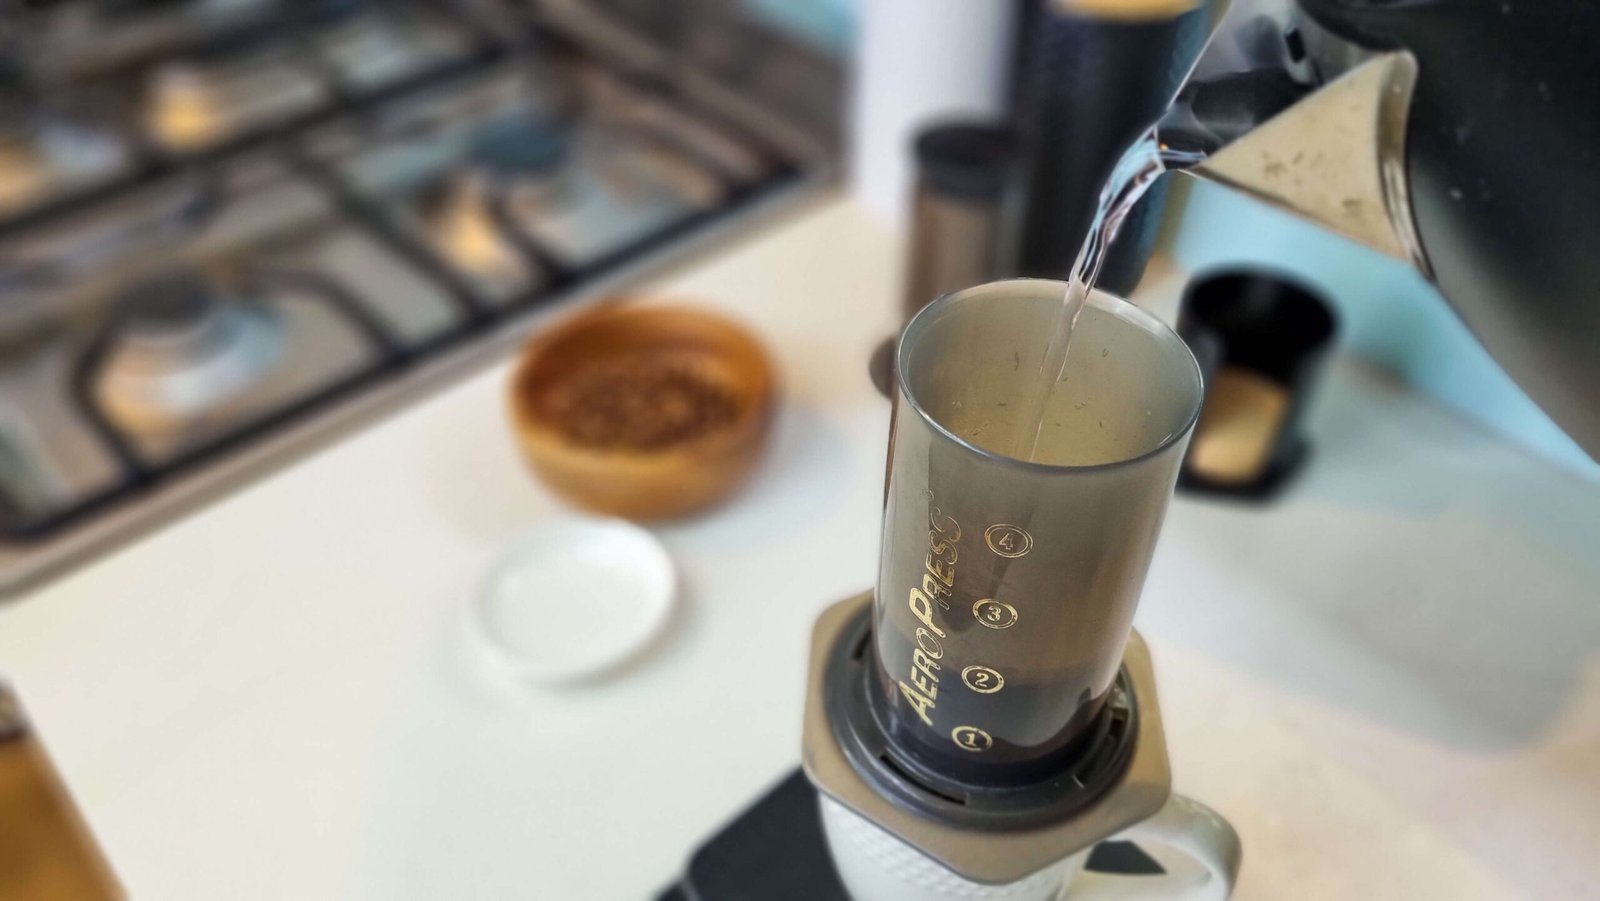
Step 4: Add Water
Fill the chamber with more hot water up to your desired ratio. In this case use 225g of water. This doesn’t have to be an exact science if you’re staring out. You can even pour the water based on the number markings. From the bottom where the coffee sits to number 1. is roughly 70g. From there each number is roughly 50g. To stop you from guessing just get a coffee or kitchen scale.
Step 5: Insert the plunger and Brew
Gently insert the plunger. Don’t worry the material that it’s made from makes it cool to the touch. Let the coffee sit until the 2min mark and then slow and steady start pushing down. This should take about 20-30 seconds until you hear a hissing sound, indicating all the coffee has been extracted. That’s it, you’re done!
Step 6: Serve and Enjoy
You can leave clean up for after you’ve finished your cup, this way the left over grinds will have cooled down. I like to clean up right away because its so quick and easy. Unscrew the filter cap, and push the plunger to eject the coffee puck into the trash or compost heap. Rinse out with water (try not use soap) and set aside to dry or start making your next cup.

Aeropress Brewing Tips and Techniques
To master the art of Aeropress brewing, consider these expert tips:
- Grind Size Matters: Adjust your grind size to control the extraction time and flavor profile. Play with different grind sizes it really makes a difference.
- Water Temperature: Use water just off the boil (around 175-185°F) for optimal extraction. Don’t be afraid to try other temperatures to see what results you can get.
- Inverted Method: For a stronger brew and better control over steeping time, try the inverted method by assembling it upside down. Be warned when the time comes to tip it over into your cup there can be some spillage if you’re not quick enough. Definitely look it up if you’ve never done it before.
Benefits of Using an Aeropress
Why choose an Aeropress over other brewing methods?
- Quick and Convenient: Brews a delicious cup of coffee in under two minutes.
- Easy Cleanup: Simply eject the coffee puck and rinse the Aeropress – no messy filters or complicated cleaning required.
- Portable: Perfect for travel, camping, or brewing coffee on the go.
Aeropress vs. Other Brewing Methods
Comparing the Aeropress with other popular methods like the French press or pour-over can help you understand its unique advantages:
- Aeropress vs. French Press: While both use immersion brewing, the Aeropress yields a cleaner cup due to its paper filter. Learn more about the benefits of the French Press.
- Aeropress vs. Pour-Over: Offers similar control over brewing variables but with a quicker extraction time and less dependence on pour technique.
Troubleshooting Common Issues
Encountering problems with your Aeropress? Here are some common solutions:
- Weak Coffee: Adjust your coffee-to-water ratio or grind size for a stronger brew.
- Bitter Taste: Use cooler water or decrease steeping time to prevent over-extraction.
- Leaks or Suction Issues: Check for any cracks in the chamber or ensure the plunger is creating a proper seal.
Quick Recipe:
Equipment:
Aeropress | Coffee (ground for filter) | Hot water | Coffee Scale | Your favorite cup
Method:
– Place the filter paper in the cap and rinse the paper with water.
– Screw the cap on to the main chamber and place cap down into your cup.
– Add 15g of coffee grounds in the chamber. and zero the scale.
– Pour just enough hot water (off the boil) the wet all the grounds.
– Start the timer and wait 20sec.
– Add the rest of the water until you get to 225g on the scale.
– Put the plunger into the main chamber.
– Wait until the timer reaches 2min and plunge down firm but gently.
– When you are done the timer should be at around 2m:20s – 2m:40s.
Frequently Asked Questions (FAQs)
- Can I use fine ground coffee with an Aeropress? Yes, but adjust your brewing time to prevent over-extraction. You can actually get pretty close to espresso-like coffee if you want.
- How do I clean an Aeropress? Simply rinse the chamber and plunger under running water; it’s dishwasher safe too!
- What’s the difference between Aeropress and AeroPress Go? The AeroPress Go is smaller and designed for travel but brews coffee similarly to the original Aeropress.
- Why is my Aeropress leaking? If it is leaking then it may be a factory defect or cracked. Most commonly it is leaking because the filter paper has moved out of place.
- Is the Aeropress eco-friendly? Yes, especially if you use a reusable metal filter instead of disposable paper filters. Note that most filter papers are compostable.